Tutorial 1 - Wired Network
Overview
This tutorial will cover some use cases when using a wired 2 node scenario in CORE.
Files
Below is the list of files used for this tutorial.
- 2 node wired scenario
- /opt/core/share/tutorials/tutorial1/scenario.xml
- /opt/core/share/tutorials/tutorial1/scenario.py
- 2 node wired scenario, with n1 running the "Chat App Server" service
- /opt/core/share/tutorials/tutorial1/scenario_service.xml
- /opt/core/share/tutorials/tutorial1/scenario_service.py
Running this Tutorial
This section covers interactions that can be carried out for this scenario.
Our scenario has the following nodes and addresses:
- n1 - 10.0.0.20
- n2 - 10.0.0.21
All usages below assume a clean scenario start.
Using Ping
Using the command line utility ping can be a good way to verify connectivity between nodes in CORE.
- Make sure the CORE daemon is running a terminal, if not already
sudo core-daemon - In another terminal run the GUI
core-gui -
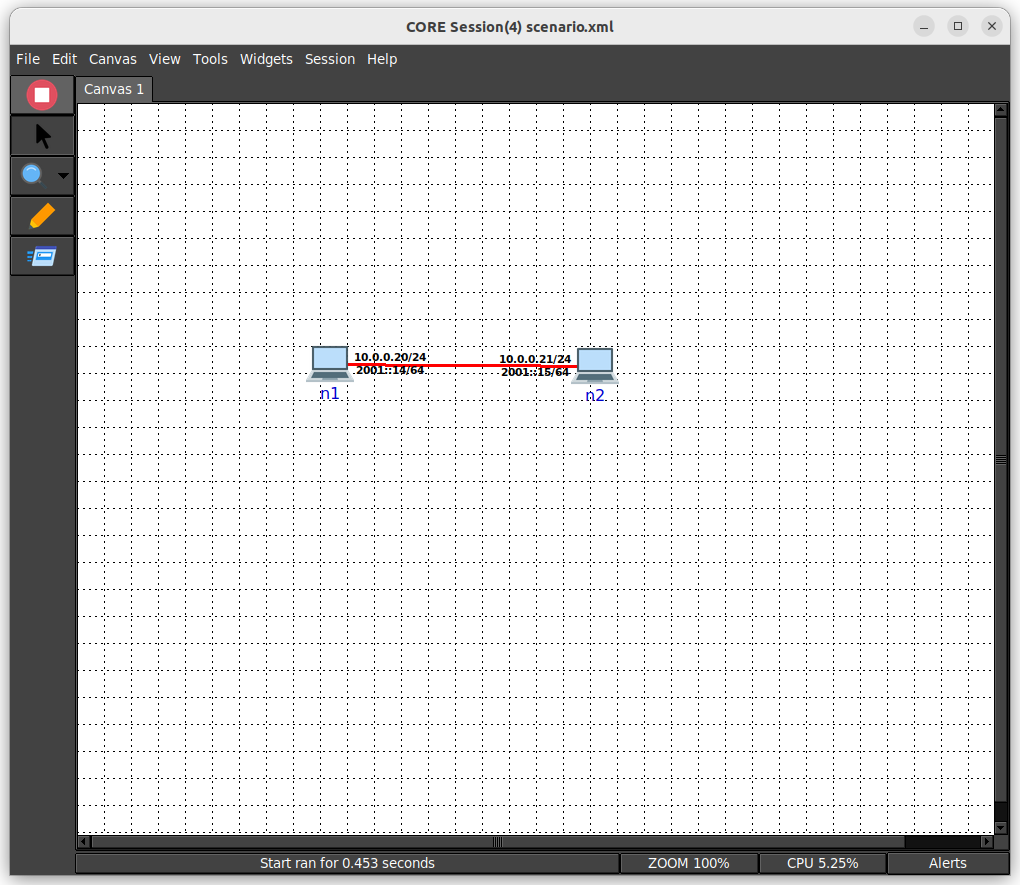
In the GUI menu bar select File->Open..., then navigate to and select scenario.xml

-
You can now click on the Start Session button to run the scenario
-
Open a terminal on n1 by double clicking it in the GUI
- Run the following in n1 terminal
ping -c 3 10.0.0.21 - You should see the following output
PING 10.0.0.21 (10.0.0.21) 56(84) bytes of data.
64 bytes from 10.0.0.21: icmp_seq=1 ttl=64 time=0.085 ms
64 bytes from 10.0.0.21: icmp_seq=2 ttl=64 time=0.079 ms
64 bytes from 10.0.0.21: icmp_seq=3 ttl=64 time=0.072 ms

--- 10.0.0.21 ping statistics ---
3 packets transmitted, 3 received, 0% packet loss, time 1999ms
rtt min/avg/max/mdev = 0.072/0.078/0.085/0.011 ms
Using Tcpdump
Using tcpdump can be very beneficial for examining a network. You can verify traffic being sent/received among many other uses.
- Make sure the CORE daemon is running a terminal, if not already
sudo core-daemon - In another terminal run the GUI
core-gui -
In the GUI menu bar select File->Open..., then navigate to and select scenario.xml
-
You can now click on the Start Session button to run the scenario
-
Open a terminal on n1 by double clicking it in the GUI
- Open a terminal on n2 by double clicking it in the GUI
- Run the following in n2 terminal
tcpdump -lenni eth0 - Run the following in n1 terminal
ping -c 1 10.0.0.21 - You should see the following in n2 terminal
tcpdump: verbose output suppressed, use -v or -vv for full protocol decode
listening on eth0, link-type EN10MB (Ethernet), capture size 262144 bytes
10:23:04.685292 00:00:00:aa:00:00 > 00:00:00:aa:00:01, ethertype IPv4 (0x0800), length 98: 10.0.0.20 > 10.0.0.21: ICMP echo request, id 67, seq 1, length 64
10:23:04.685329 00:00:00:aa:00:01 > 00:00:00:aa:00:00, ethertype IPv4 (0x0800), length 98: 10.0.0.21 > 10.0.0.20: ICMP echo reply, id 67, seq 1, length 64
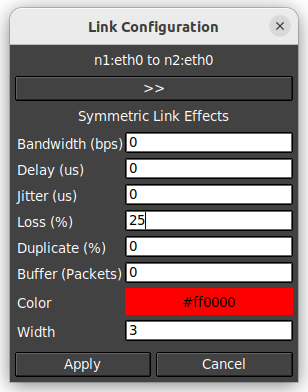
Editing a Link
You can edit links between nodes in CORE to modify loss, delay, bandwidth, and more. This can be beneficial for understanding how software will behave in adverse conditions.
- Make sure the CORE daemon is running a terminal, if not already
sudo core-daemon - In another terminal run the GUI
core-gui -
In the GUI menu bar select File->Open..., then navigate to and select scenario.xml
-
You can now click on the Start Session button to run the scenario
-
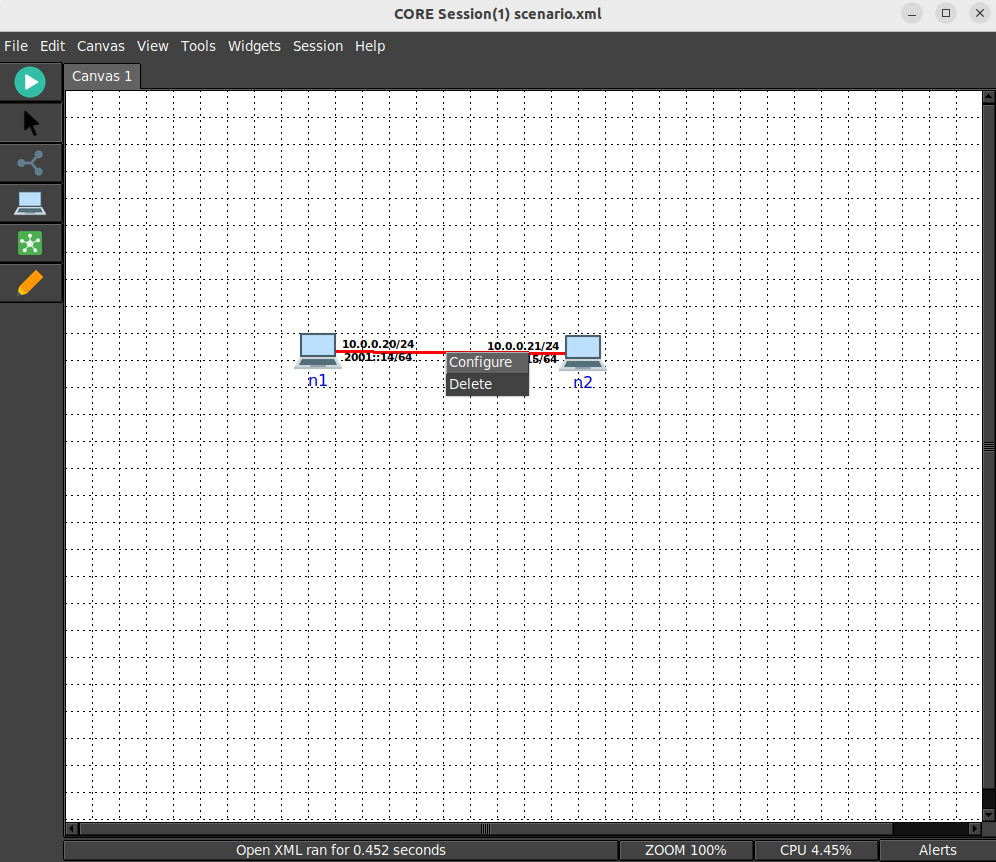
Right click the link between n1 and n2
-
Select Configure
-
Update the loss to 25
-
Open a terminal on n1 by double clicking it in the GUI
- Run the following in n1 terminal
ping -c 10 10.0.0.21 - You should see something similar for the summary output, reflecting the change in loss
--- 10.0.0.21 ping statistics --- 10 packets transmitted, 6 received, 40% packet loss, time 9000ms rtt min/avg/max/mdev = 0.077/0.093/0.108/0.016 ms - Remember that the loss above is compounded, since a ping and the loss applied occurs in both directions
Running Software
We will now leverage the installed Chat App software to stand up a server and client within the nodes of our scenario.
- Make sure the CORE daemon is running a terminal, if not already
sudo core-daemon - In another terminal run the GUI
core-gui -
In the GUI menu bar select File->Open..., then navigate to and select scenario.xml
-
You can now click on the Start Session button to run the scenario
-
Open a terminal on n1 by double clicking it in the GUI
- Run the following in n1 terminal
export PATH=$PATH:/usr/local/bin chatapp-server - Open a terminal on n2 by double clicking it in the GUI
- Run the following in n2 terminal
export PATH=$PATH:/usr/local/bin chatapp-client -a 10.0.0.20 - You will see the following output in n1 terminal
chat server listening on: :9001 [server] 10.0.0.21:44362 joining - Type the following in n2 terminal and hit enter
hello world - You will see the following output in n1 terminal
chat server listening on: :9001
[server] 10.0.0.21:44362 joining
[10.0.0.21:44362] hello world
Tailing a Log
In this case we are using the service based scenario. This will automatically start
and run the Chat App Server on n1 and log to a file. This case will demonstrate
using tail -f to observe the output of running software.
- Make sure the CORE daemon is running a terminal, if not already
sudo core-daemon - In another terminal run the GUI
core-gui -
In the GUI menu bar select File->Open..., then navigate to and select scenario_service.xml
-
You can now click on the Start Session button to run the scenario
-
Open a terminal on n1 by double clicking it in the GUI
- Run the following in n1 terminal
tail -f chatapp.log - Open a terminal on n2 by double clicking it in the GUI
- Run the following in n2 terminal
export PATH=$PATH:/usr/local/bin chatapp-client -a 10.0.0.20 - You will see the following output in n1 terminal
chat server listening on: :9001 [server] 10.0.0.21:44362 joining - Type the following in n2 terminal and hit enter
hello world - You will see the following output in n1 terminal
chat server listening on: :9001
[server] 10.0.0.21:44362 joining
[10.0.0.21:44362] hello world
gRPC Python Scripts
You can also run the same steps above, using the provided gRPC script versions of scenarios. Below are the steps to run and join one of these scenario, then you can continue with the remaining steps of a given section.
- Make sure the CORE daemon is running a terminal, if not already
sudo core-daemon - From another terminal run the tutorial python script, which will create a session to join
/opt/core/venv/bin/python scenario.py - In another terminal run the CORE GUI
core-gui - You will be presented with sessions to join, select the one created by the script